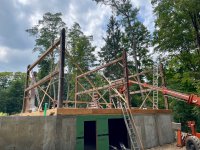
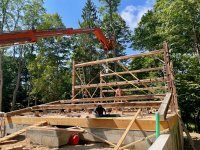
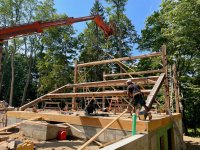
I would say the bookshelf is a a success.

You are using an out of date browser. It may not display this or other websites correctly.
You should upgrade or use an alternative browser.
You should upgrade or use an alternative browser.
Carpenter talk
- Thread starter Yinzer Moto
- Start date
Thank you. A miscalculation left us short material so more was sourced today. It was too moist to install and the finisher can't be there anytime soon so right now it is at a halt at 75% complete.Looking great!
GMK999
Well-known member
We had a huge pine cut down in the driveway last week Close to 100' and 42" at the stump. We left the stump tall 32" so I took a page from the JimVonBaden playbook and made a sled for my router, filled the line between the Box and the cut (where the tree broke) with blue epoxy and a few passes later '' Viola!! . That is as far as I will go with it though as it is still green and I will probably only use it as a work / gardening bench.
That said, it was fun and the neighbors got to wonder what the crazy guy is up to now!!

That said, it was fun and the neighbors got to wonder what the crazy guy is up to now!!
GMK999
Well-known member
Thanks,Looks nice and solid. Is it roughly level?
Yes it pitches slightly to the back 1/4"over the 42" so it won't pool water I set the runners for the sled with my laser. I ran 3 passes to get it level the first two were pretty rough 3/4" at a time they were hit and miss with the uneven stump.Then I poured almost a quart of epoxy. The last pass was an even 1/4" and after the epoxy cured. all in all about 2 hours work.
LOL you sound like my neighbors.. I may do that but it was just cut last week and is still weeping sap.Sandpaper doesn't have a chance. I'll give it a few weeks then decideIt wouldn't take long to clean it up with a belt sander and start applying oil. That might keep it from splitting much more, too.
JimVonBaden
Kool Aid!
GMK999
Well-known member
Squamch
Active member
Lotta fancy finishing work in here. That's what I love. But what pays the bills this month is snap ties..


skibum69
Well-known member
Anyone who was watching my build thread over on ADV know I've been working on the house for ages and the upstairs reno that took 3 years. Six years later the last thing on the list was the stairs. Having put down spruce floors upstairs and downstairs I had a vision of larch for the stairs with the very different open grain. Larch is called juniper here and tamarack out west.
I cut down a big one in the back yard and my mill guy 15 minutes down the road milled it onto 2" planks.

Planed, sanded and hand bombed through the table saw they went into the living room to dry further and acclimatize. I've read it likes to twist so I put some weight on it.

The old stairs were certainly nothing special.

I'm not a carpenter, I have never messed with stairs, ever. My first thought was to use the new wood to cover the old stairs. The reason for the 2" treads was to match the change in floor height when I put down the spruce floors. Cut off the tongues to allow for coverage.

A Moto friend came over to help, he's smarter than me and knows stairs. When he explained how ripping out the old ones and putting in new ones from scratch made more sense I smartened up a little. See the difference in grain? And who the hell uses 1" board for stringers? The rest of the house is extra built and they cheaped out on the stairs?

It was still plenty of fucking around measuring and cutting but the result was everything I was hoping for. The top needed a bit of help to level as the stringer had cracked and sagged. Level stairs, what a novelty!

We were getting close to the top and I laid a tread on the last step. Of course I wasn't paying attention and it went ripping down the new stairs. Damn! Idiot! Yeah it dinged up a few of them.

As you can imagine I was not happy. My buddy said to sand it out but a little discussion over on ADV a guy said to mix a little sawdust with epoxy for the fix. Came out pretty good me thinks, hardly noticeable under the verathane.

I think it looks pretty awesome with 5 coats of verathane. As you can imagine I'm pretty stoked and for once my stairs don't creak!

Of course I didn't have enough wood prepped for the risers so we finished all the treads and cut the top step but had to leave 8 risers open. I hauled a bunch more planks out of the shed and put them inside for a few weeks then finished that job.

Pretty deadly! You can see the sides that I cut a big dado into. I have a plank ready to go to cut little triangles into to fill in the sides, that too will start today. I only had to scarf in about 6" at the bottom as the plank I used for the sides was just a little short.

Today I'm glueing in the top step and the pieces going back to match up with the floor. A bit of subfloor screwed in to go under the threshold. 2 Pieces of 2" larch will fill the remaining space. No way to screw from the bottom so glue it will be.

Pretty excited to see the end of all of my renos and how good everything came out. Maybe I'll add here when I finish those last little details.
Now the missus wants to take out a couple of cupboards I the kitchen and replace them with nice thick larch shelves. I guess it's a good thing there are a couple of big ones out back that will have to come down. I'm going to have plenty for big planks, now I have to think of more projects to use it.Too bad I'm not a boat builder as larch is very rot resistant.
I cut down a big one in the back yard and my mill guy 15 minutes down the road milled it onto 2" planks.
Planed, sanded and hand bombed through the table saw they went into the living room to dry further and acclimatize. I've read it likes to twist so I put some weight on it.
The old stairs were certainly nothing special.
I'm not a carpenter, I have never messed with stairs, ever. My first thought was to use the new wood to cover the old stairs. The reason for the 2" treads was to match the change in floor height when I put down the spruce floors. Cut off the tongues to allow for coverage.
A Moto friend came over to help, he's smarter than me and knows stairs. When he explained how ripping out the old ones and putting in new ones from scratch made more sense I smartened up a little. See the difference in grain? And who the hell uses 1" board for stringers? The rest of the house is extra built and they cheaped out on the stairs?
It was still plenty of fucking around measuring and cutting but the result was everything I was hoping for. The top needed a bit of help to level as the stringer had cracked and sagged. Level stairs, what a novelty!
We were getting close to the top and I laid a tread on the last step. Of course I wasn't paying attention and it went ripping down the new stairs. Damn! Idiot! Yeah it dinged up a few of them.
As you can imagine I was not happy. My buddy said to sand it out but a little discussion over on ADV a guy said to mix a little sawdust with epoxy for the fix. Came out pretty good me thinks, hardly noticeable under the verathane.
I think it looks pretty awesome with 5 coats of verathane. As you can imagine I'm pretty stoked and for once my stairs don't creak!
Of course I didn't have enough wood prepped for the risers so we finished all the treads and cut the top step but had to leave 8 risers open. I hauled a bunch more planks out of the shed and put them inside for a few weeks then finished that job.
Pretty deadly! You can see the sides that I cut a big dado into. I have a plank ready to go to cut little triangles into to fill in the sides, that too will start today. I only had to scarf in about 6" at the bottom as the plank I used for the sides was just a little short.
Today I'm glueing in the top step and the pieces going back to match up with the floor. A bit of subfloor screwed in to go under the threshold. 2 Pieces of 2" larch will fill the remaining space. No way to screw from the bottom so glue it will be.
Pretty excited to see the end of all of my renos and how good everything came out. Maybe I'll add here when I finish those last little details.
Now the missus wants to take out a couple of cupboards I the kitchen and replace them with nice thick larch shelves. I guess it's a good thing there are a couple of big ones out back that will have to come down. I'm going to have plenty for big planks, now I have to think of more projects to use it.Too bad I'm not a boat builder as larch is very rot resistant.


