What's new

21 year old BMW K1200RS gets a new lease on life.

Finally back from vacation and back to work on the project.

Easing back into it with the seat recover. I left the original set cover on to offer some foam protection since the new seat cover does not appear waterproof.

Cleaned it with alcohol, then sprayed on some adhesive to keep the dished part dished.
jLmpqq.jpg
rGyH9l.jpg
86avva.jpg


Used some weights to set the glue.
AlEmZX.jpg

Then worked all the way around it with 3/8 staples and an air stapler.
RbiKFD.jpg
p6Frgm.jpg
kH1d59.jpg

Will trim the fabric today on the back side.

Came out pretty nice, not perfect, but nice.
ivwgxl.jpg
VpVRGv.jpg

I added the weight back to settle the rider seat area more.
 
Nice project! My brother has the same bike. He bought it while stationed in Okinawa and has imported it to the states. It has had a slew of gremlins. The remaining seems to be a misfiring issue.

If I were to ride down that way again, could you maybe show me how to do better and more in-depth work on my 2015 V-strom? I'd hate to attempt something beyond minor and fuck something up.
 
Does it look better than before? Yes

Can flaws be seen at 30 mph? No

200.gif
 
JimVonBaden do you have a plan when you buy these? Like "fix this, but not that"? Or just dive into anything that needs doing? Also, Do you set a hard budget before you begin?
 
JimVonBaden do you have a plan when you buy these? Like "fix this, but not that"? Or just dive into anything that needs doing? Also, Do you set a hard budget before you begin?
Sometimes I have a plan, like the bike above. Other times I develop the plan as I take a bike apart and look at what needs to be done. I generally try to keep the total costs below what I can sell it for.

This one started out as a referb, then I decided to go a completely different direction. I made it full electric.
MNlVyp.jpg
T3RNj3.jpg
cojV7g.jpg
lJc5pg.jpg
 
Since I did the one side panel, I decided to do the other. My thought is that I will give the rest of the wrap to the new owner and he can try it himself, or pay to have it done by a pro. I just don't think I can do a good enough job on the other complicated parts. Lesson learned, paint over wrap. The cost is similar and I am a much better painter (still just OK) than wrapper.

DGIlY5.jpg
AE4RMA.jpg

Something else that helps is wrap primer. I didn't use it on the other side and the cut points are struggling to stay down. This helps a LOT.
NyaCl7.jpg
 
Started easy today. Removed the gas tank, then the air filter. Ugly, but it did its job.

SNRasf.jpg
OCGkrR.jpg
L3TGR2.jpg

Then on to the servo-ABS. I had hoped to repair it, but it was just done. I pulled out the unit.
LIqjUa.jpg
rWsSbn.jpg
l5aJoF.jpg

It was toast. Fortunately the electronics looked good. So on to the ABS delete. Took out all the old lines, and unnecessary bits.


Then installed new SS lines to bypass the ABS unit.
qVwIkZ.jpg
dtTgqn.jpg
sKlafl.jpg
ei1qEP.jpg
xAQc61.jpg
PXlqkv.jpg
8wn54n.jpg

Bled and they felt good.

Then built a cover for the electronics needed to preserve the cruise control and brake lights.
GkBWkd.jpg
OJYRdi.jpg
Fh9fDX.jpg

Tomorrow I will test everything, then seal up the electronics and put it all back together.
 
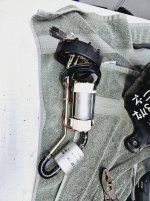
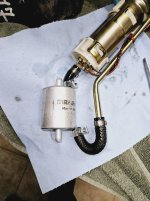
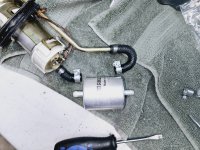
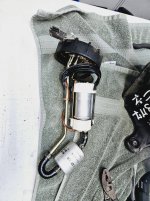
Way to take a 45 minute job to 90. I changed the fuel filter and sock today. It was pretty straight forward:

Mark for orientation, then open:
iBsQq3.jpg
wmVI0R.jpg

Pull out and disconnect the vent lines. Note that I marked the top one with a ziptie so I know which is which for assembly. If you do it wrong you end up sending drain water from around the fuel cap into the carbon canister, which ruins it.
fLY9H7.jpg
LwDDir.jpg
HyZVIt.jpg

Then pull the pump and filter all the way out. Make a note of the filter orientation/direction and lay out the replacement.
SUa7Wo.jpg
FNHiPi.jpg
c5IEfn.jpg

Remove the factory Oetiker clamps. Beemer Boneyard supplies proper FI clamps with the filter. They also give replacement quick disconnect O-rings:
G3Xr8F.jpg
0hkhSp.jpg
bBkcnv.jpg
9c26S9.jpg

Reassemble and done.


Sharp eyed people will see my mistake.
 
Top Bottom Back Refresh