motocopter
Well-known member
I'm a former Yamaha, Kawasaki, and Husqvarna tech and like tools; but, man if I had to carry that many tools I'd start to suspect I have the wrong bikes. 
Follow along with the video below to see how to install our site as a web app on your home screen.
Note: This feature may not be available in some browsers.
Hah! The key is that these are basically all the tools I own. I updated the post with a short summary of how I organized and at some point I'll take a few pictures. Going skiing this weekend/next week though so sadly probably not for another three weeks.I'm a former Yamaha, Kawasaki, and Husqvarna tech and like tools; but, man if I had to carry that many tools I'd start to suspect I have the wrong bikes.
Really, everything is driven by the NYC apartment. Like, I'd get a drill press if I could but given I don't even have a garage, a drill press seems ambitious in the apartment.Ok, I like portability too. A 300 pound tool chest is no joke.
A table top one would be good choice for kitchen counter and even be used as a mixer for kitchen duty.Really, everything is driven by the NYC apartment. Like, I'd get a drill press if I could but given I don't even have a garage, a drill press seems ambitious in the apartment.
Just coming back from a week on vacation skiing which was very nice. Now... VAN TIME AND I HAVE BIG PLANS.
OK, I don't have big plans. But I did get a super important job accomplished today.
Look at this barren wasteland. How can you even tell what vehicle it is?

Much better.

$30 on ebay and worth every penny.
Minimum. I assume you noticed that the CDI is red.That probably added 40hp and 70 torks

It's been a while because, you know, life. But I did manage to get out and do a little more work on the van this weekend. I'd planned to do more, because I always do. But as soon as I was ready to go under the van, it started snowing with some serious gusts and then I ran into the problem of "how do you hold nuts/bolts on one side of a wall so you can tighten them down from the other side?"
First thing's first. The right rear brake has been dragging because the caliper was a rusted piece of garbage. Shhhh, the rotor is supposed to be that color. And sitting on the street during the winter while getting splashed with salt water every time a truck goes by shows exactly where the bare metal is. Add wire wheeling and a coat of paint for all of that to the project list. This would have been a much easier project if I'd sprung for a new $50 vacuum bleeder.

"Try CAD" they said. "It's so easy" they said. "No, much better than just taking the wall out and tracing it onto plywood" they said. I'm sure this was actually easier, because I fucking hate moving that big steel wall around. It's so unwieldy. And I hadn't thought things through properly so my first step had been to do some more work attaching the wall to the van and to itself. By the time I got to this I'd spent an hour using a tiny, shitty vacuum pump that was left over from (and perfectly fine for) putting a clake 2 on my bike a couple years ago now where the rubber seals had swollen and didn't really seal, been snowed on sideways under the van, hopped out of the front, gone into the back, climbed over the bikes, tried to bolt something in only to hear my wrench or other foolishly attempted rigged up solution fall off the other side and missed lunch (easily the biggest of the tragedies). So I didn't finish it, but this is going to be the template for the plywood portions of the wall. Once that's up, I'm going to replace all the brake fluid because it was a deep revolting color instead of the beautiful clearish liquid it should have been and the pads and sheesh that rotor really does look rough nowgo riding.

Plusnuts have been OK (but not great) for me on holding things but the stupid wall is three pieces - a top, a side with a door and then another side and they all need to be held together and the carpet takes up space so moves where they get held together. I used plusnuts plus some steel angle braces to hold the top one to the van in place and then I wish I'd recorded it on video so I could fast forward playing yakety sax but it was just a thousand trips back and forth (and in the back because I'm stupid I kept climbing over the bikes and toolboxes instead of just taking the toolboxes out and easily walking in because I thought surely this would be the last time but it wasn't...). Just a comedy of errors. But I really hate taking the wall out and I did need to get it all lined up in the van first.Yeah, holding bolts on the other side is sometimes the biggest hold ups on these project. Wether it is on the opposite side of a wall or under the van.
I have never subscribed to anything on YouTube but I would be willing to make an exception in this case.I wish I'd recorded it on video so I could fast forward playing yakety sax but it was just a thousand trips back and forth (and in the back because I'm stupid I kept climbing over the bikes and toolboxes instead of just taking the toolboxes out and easily walking in because I thought surely this would be the last time but it wasn't...). Just a comedy of errors.
I have never subscribed to anything on YouTube but I would be willing to make an exception in this case.
"416"?Just coming back from a week on vacation skiing which was very nice. Now... VAN TIME AND I HAVE BIG PLANS.
OK, I don't have big plans. But I did get a super important job accomplished today.
Look at this barren wasteland. How can you even tell what vehicle it is?
Much better.
$30 on ebay and worth every penny.
My sincere condolences that your van is smaller and slower than mine."416"?
My T1n om647 says 316cdi...
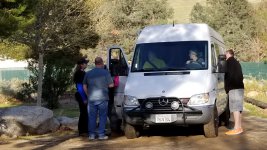
I guess this shitty photo is the best I have.
I did use vise grips a few times. But not welding magnets. That's a great idea, thanks!For holding nuts in place while you run around to the other side to thread in a bolt, I'd go for Vise grips held in place with welding magnets. Maybe just the welding magnets.